
If your energy bills keep climbing no matter how careful you are with the thermostat, your home may be quietly leaking money through spots you never think to check. Hidden energy drains are sneaky because they do not announce themselves with a broken switch or a strange noise. Instead, they show up as a slightly warmer bedroom in summer or a chilly draft in winter that you have learned to live with. This guide walks through the most common culprits and practical fixes so you can stop paying to heat and cool the outdoors.
Insulation Problems That Affect Your Home
A shocking amount of conditioned air escapes straight through the ceiling, and most homeowners never look up to check. Older homes especially tend to have thin or unevenly distributed insulation in the attic space, which lets heat pour out in winter and bake the upper floors in summer. Adding or upgrading attic insulation is one of the highest-return improvements you can make, often paying for itself within a few years through lower utility bills.
Before assuming you need more material, check what you already have. Insulation settles, gets damaged by pests, or gets pushed aside during past repairs, leaving gaps that undo its effectiveness.
- Look for insulation that is compressed, discolored, or missing in patches
- Check that attic vents are not blocked by insulation, which can trap moisture
- Note any daylight visible through the roof deck, a sign of gaps needing attention
- Measure depth against your region’s recommended R-value
Windows That Quietly Increase Energy Consumption

Windows are one of the most obvious yet overlooked sources of energy loss. Single-pane glass, warped frames, and failed seals let heat transfer freely between inside and outside air, forcing your HVAC system to work overtime. Simple window treatments like insulated cellular shades or thermal curtains can noticeably reduce heat loss in winter and block solar gain in summer, buying you time before a bigger investment is needed.
When treatments alone are not enough, it may be time to consider window replacement. Modern double or triple-pane windows with low-E coatings dramatically outperform older glass, and many homeowners notice an immediate difference in comfort and noise reduction after installation.
- Feel for drafts along the frame edges on a windy day
- Check for condensation between panes, which signals a broken seal
- Compare your window age to their typical 15 to 20 year lifespan
- Consider energy ratings like U-factor and solar heat gain coefficient when shopping
Roof Issues That Make a Difference
A roof does more than keep rain out; it plays a direct role in regulating indoor temperature. Cracked shingles, damaged flashing, or worn underlayment let heat and moisture sneak into the attic space, undermining even the best insulation. Bringing in a local roofing company for an inspection once a year, or after major storms, can catch small issues before they become expensive problems.
Timely roof repair services are often far cheaper than waiting until a leak forces a full replacement. Addressing minor damage early also protects the insulation and ductwork below the roofline, which keeps your whole energy system working as intended.
- Watch for missing, curling, or granule-shedding shingles
- Check gutters for excessive grit, a sign shingles are wearing down
- Look for water stains on ceilings after heavy rain
- Schedule inspections in spring and fall to catch seasonal wear
Wall Problems That Go Unnoticed
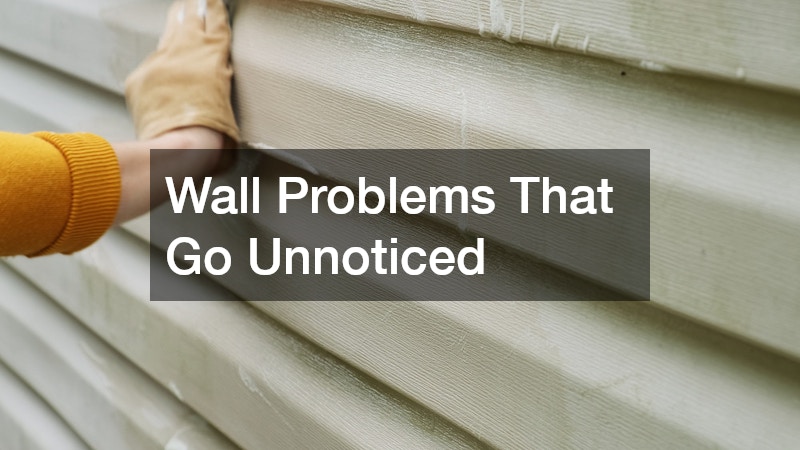
Exterior walls take a beating from sun, rain, and temperature swings, and worn siding can quietly let conditioned air escape while letting outdoor air in. Over time, this constant exposure breaks down seals and materials in ways that aren’t always obvious from a quick glance, which is why small issues often go unnoticed until energy bills start climbing.
Warped panels, cracked caulking, or gaps at corners and seams are common signs that your home’s outer shell is not doing its job anymore. Other red flags include peeling paint, bubbling on interior walls near exterior surfaces, or a faint musty smell that hints at moisture creeping in behind the siding. Even a slight draft near an outlet on an exterior wall can point to a breach in the barrier that’s supposed to keep your home sealed.
The type of siding matters too. Vinyl can crack in extreme cold, wood is prone to rot if moisture gets trapped, and fiber cement, while durable, can develop hairline cracks at improperly sealed joints. Knowing which material you have helps you spot the specific wear patterns to watch for.
A qualified siding contractor can assess whether the issue is cosmetic or a sign of deeper insulation and moisture problems. Many will use tools like moisture meters or infrared cameras to check what’s happening beneath the surface, giving you a clearer picture of whether you’re dealing with a simple repair or a more extensive replacement.
Your walls do more than hold up the roof—they’re a major boundary between conditioned indoor air and the outdoors, and gaps or thin materials here quietly bleed energy year-round. Beyond patch repairs, updated siding services often include modern insulated panels that add a thermal barrier while refreshing your home’s appearance. Many of these systems pair foam backing with vinyl, fiber cement, or engineered wood, boosting a wall’s R-value by several points compared to older, uninsulated siding.
This is especially worth considering if your siding is original to a home built more than 20 years ago, since materials and installation standards have improved significantly since then. Older installations often lack proper vapor barriers or continuous insulation, leaving seams where air infiltrates unnoticed. A contractor can inspect for warping, gaps at corners and trim, and moisture damage—all signs that your walls may be costing you more on utility bills than you’d expect.
- Inspect siding for warping, cracking, or loose panels, especially on the sun-facing and weather-exposed sides of your home
- Check caulking around windows and doors for gaps wider than 1/8 inch, and re-caulk if it’s cracked, peeling, or missing
- Look for bubbling or peeling paint, which can signal trapped moisture working its way out through the wall
- Press on siding near the foundation and corners to check for soft spots, which often mean water has gotten underneath
- Consider a blower door test if you suspect drafts but can’t pinpoint the source, since walls often hide leaks
- Ask about insulated siding options if you’re already planning an upgrade, as they can add R-2 to R-5 of extra insulation value
System Issues That Impact Efficiency
Your heating and cooling system runs almost constantly during extreme weather, and even small inefficiencies add up fast. Dirty filters, aging components, or a unit that is simply too large or small for your home can waste significant energy without any obvious warning signs. Having a reputable HVAC company perform a seasonal tune-up helps catch efficiency losses before they show up as a spike in your utility bill.
Many homeowners wait until something breaks completely, but preventive maintenance is almost always cheaper than emergency repairs. Ask for a full efficiency check rather than just a filter swap, since refrigerant levels, coil cleanliness, and airflow all affect performance.
- Replace air filters every one to three months depending on usage
- Keep outdoor units clear of debris and vegetation
- Schedule professional maintenance twice a year, before summer and winter
- Track your energy bills seasonally to spot unusual increases
Hidden Buildup That Affects Your Air
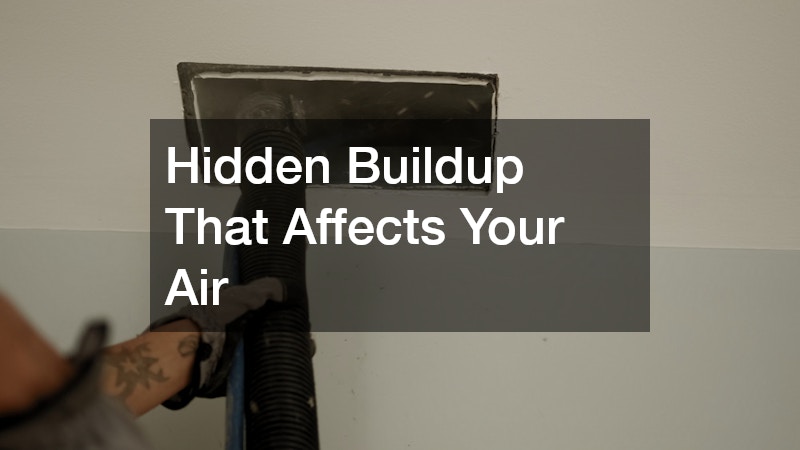
Ducts are out of sight, which means problems inside them can go unnoticed for years. Leaky joints, disconnected sections, or dust buildup force your system to push air through a compromised network, wasting energy and reducing comfort in certain rooms. Professional air duct cleaning removes accumulated debris that restricts airflow and can also reveal leaks or damage that would otherwise stay hidden.
Beyond energy savings, clean ducts contribute to better indoor air quality, which matters if anyone in the household has allergies or respiratory sensitivities. It is worth having ducts inspected any time you notice uneven temperatures between rooms or a sudden increase in dust around vents.
- Check for visible dust buildup around vent covers
- Notice if certain rooms are consistently warmer or cooler than others
- Look for kinked or crushed flexible ductwork in accessible areas
- Ask about sealing services in addition to cleaning for maximum efficiency
Heating Issues That Affect Comfort
Furnaces lose efficiency gradually, which makes the decline easy to miss until bills climb noticeably. A unit older than 15 years is working against physics no matter how well it is maintained, since combustion technology and insulation standards have advanced considerably. In many cases, furnace replacement with a newer high-efficiency model saves more over time than continuing to repair an aging system.
Signs that replacement is nearing include frequent repairs, uneven heating, rising bills despite normal usage, and unusual noises during operation. Getting a professional efficiency rating comparison between your current unit and modern options can make the decision easier by showing real numbers rather than guesswork.
- Compare your furnace’s AFUE rating to current Energy Star standards
- Track repair costs over the past two years to spot a pattern
- Ask about rebates or incentives for high-efficiency replacements
- Consider a properly sized unit rather than simply matching the old capacity
Small Gaps That Cause Big Losses
Not every energy drain requires a major project. Gaps around electrical outlets, baseboards, and pipe penetrations allow surprising amounts of air to pass through, especially in older homes. The Department of Energy estimates that air leaks like these can account for 10-15% of a home’s heating and cooling losses, even though each individual gap looks negligible.
Outlet and switch plates on exterior walls are common offenders; foam gaskets that sit behind the cover plate cost only a few dollars per outlet and take seconds to install. Baseboards and window trim often separate slightly from drywall as houses settle, creating thin but continuous drafts along entire walls. Pipe penetrations under sinks or where lines enter through exterior walls are frequently overlooked because they’re hidden from view.
A simple sweep with a can of expanding foam sealant, caulk, or weatherstripping can close many of these gaps in an afternoon. For larger cracks, backer rod paired with caulk gives a more durable seal than caulk alone. Checking these spots once a year, ideally before the heating or cooling season starts, keeps small leaks from reopening unnoticed.
Doors deserve particular attention since they are used constantly and their seals wear out faster than most people expect. Rubber and foam weatherstripping typically breaks down within three to five years, especially on exterior doors exposed to sun and temperature swings, so a seal that looks fine may already be letting air through.
A simple way to check is to run your hand along the door frame on a windy day or hold a lit candle near the edges — flickering flames or a noticeable breeze mean it’s time for a fix. Door sweeps, which attach to the bottom of the door, are especially effective at blocking drafts and keeping out dust, insects, and even small pests.
Replacing weatherstripping or installing a new sweep usually costs less than $20 and takes under thirty minutes with basic tools. For older or warped doors, adding a threshold seal or adjustable door bottom can close gaps that standard sweeps miss, giving an inexpensive fix that pays for itself within a single heating season.
- Hold a lit candle or incense stick near outlets, switch plates, and baseboards on a windy day; flickering or sideways smoke reveals drafts you can’t feel by hand
- Inspect weatherstripping around exterior doors each fall, replacing it if it feels brittle, flattened, or lets light through when the door is closed
- Seal gaps around pipes, vents, and cables entering the home using caulk for small cracks or expanding foam for openings wider than a quarter-inch
- Add door sweeps to any exterior door showing visible light underneath, choosing a vinyl or brush style that hugs uneven thresholds
- Check attic hatches and recessed lighting fixtures for gaps too, since warm air often escapes upward and goes unnoticed
Everyday Habits That Quietly Add Up

Even a perfectly maintained home can waste energy through daily habits that go unnoticed. Leaving lights on in empty rooms, running full loads of laundry on hot water, or setting the thermostat aggressively rather than gradually all contribute to higher bills. Small behavioral shifts often deliver savings without any financial investment at all.
Pairing better habits with the physical improvements covered earlier creates a compounding effect, since a well-sealed and insulated home responds faster to smart usage patterns. Tracking your usage for a month can reveal patterns you did not realize were costing you money.
- Use a programmable or smart thermostat to avoid manual overuse
- Wash clothes in cold water when possible to cut water heating costs
- Turn off ceiling fans when rooms are unoccupied, since they cool people, not air
- Unplug electronics that draw standby power when not in use
Hidden energy drains rarely announce themselves loudly, but their combined effect shows up clearly on your monthly bill. Working through your attic, windows, roof, siding, HVAC system, and ductwork one at a time will help you identify exactly where your home is losing efficiency. Start with a simple walkthrough using the checklists above, then prioritize the fixes that offer the biggest impact for your budget. Taking action now means a more comfortable home and lower bills for years to come.